Knowledge Base
AVM Content
Setting up the FRITZ!Box for use with a fiber optic connection from iWay
The FRITZ!Box is optimally prepared for use with iWay. Simply connect the FRITZ!Box to the fiber optic connection, have Swisscom activate it, and configure the internet connection in the FRITZ!Box.
The complete FRITZ!Box range of functions for internet, telephony, and smart home is then available to all of the devices in your home network without restriction.
Requirements / Restrictions
- FRITZ!Box Fiber with SFP plug-in module 'FRITZ!SFP XGS-PON'.
Note:All instructions on configuration and settings given in this guide refer to the latest FRITZ!OS for the FRITZ!Box.
1 Inserting the SFP module into the FRITZ!Box
The FRITZ!Box is available in several different product variants, each of which is delivered with different components. If the FRITZ!Box you received did not have an SFP plug-in module inserted, perform the following step:
- Insert the SFP module 'FRITZ!SFP XGS-PON' into the fiber slot of the FRITZ!Box.
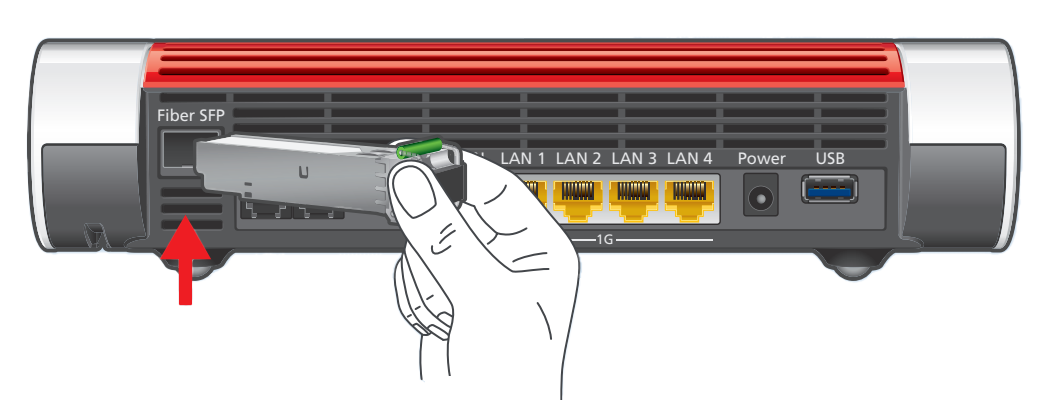
Inserting the SFP module into the FRITZ!Box
2 Connecting the FRITZ!Box to your fiber optic connection
- Remove the dust protection caps from the fiber optic cable, the SFP module in the FRITZ!Box, and from the fiber optic socket (OTO).
- Connect the fiber optic cable to the SFP module in the FRITZ!Box and to the fiber optic socket. Do not bend the fiber optic cable and do not hold the ends of the cable in front of your eyes.
Note:You can find information on selecting a suitable fiber optic cable in our guide Which fiber optic cable do I need?
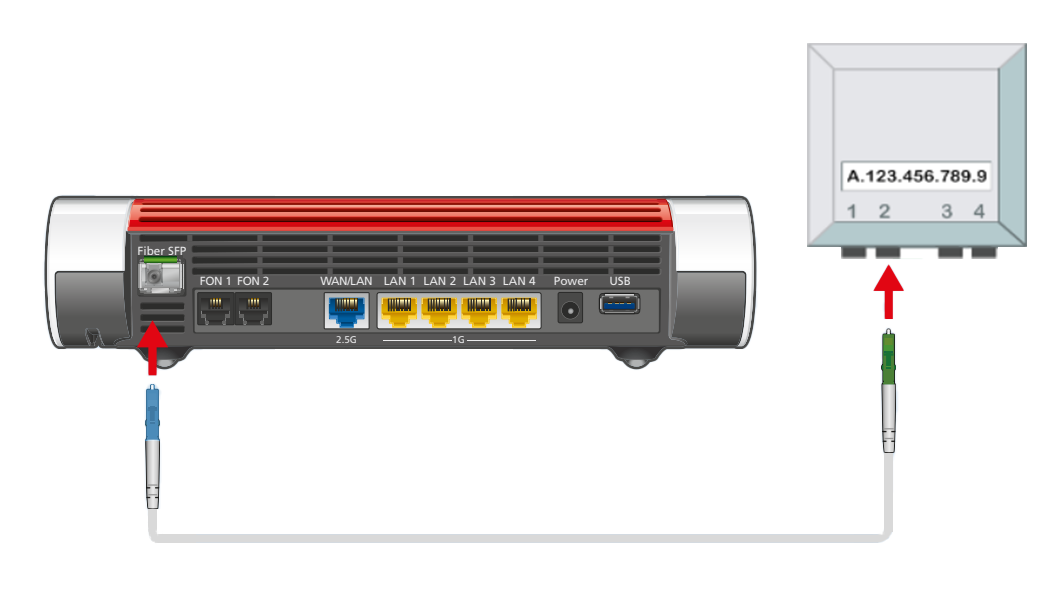
Connecting the FRITZ!Box to the fiber optic connection
3 Plugging the FRITZ!Box in
- Connect the power adapter to the FRITZ!Box's power socket and plug it into an electrical socket.
4 Enabling the fiber optic connection with Swisscom
- Call up https://swisscom.ch/start in your web browser. It may take a few minutes for the page to be shown.
- Enter the OTO ID of your fiber optic cable socket (for example B.777.777.777.X).
- Enter the plug number (slot number).
- Enter the activation code you received from iWay.
- Click on 'Aktivieren' to start activating your fiber optic connection. If may take up to 30 minutes for the activation to be completed and before the internet connection can be used.
5 Configuring the internet connection in the FRITZ!Box
- Open the FRITZ!Box user interface.
- Enter the FRITZ!Box password given on the type label of the FRITZ!Box and click on 'Log In'.
- If the wizard for internet access does not start automatically, click on 'Wizards' and then on 'Configure the Internet Connection'.
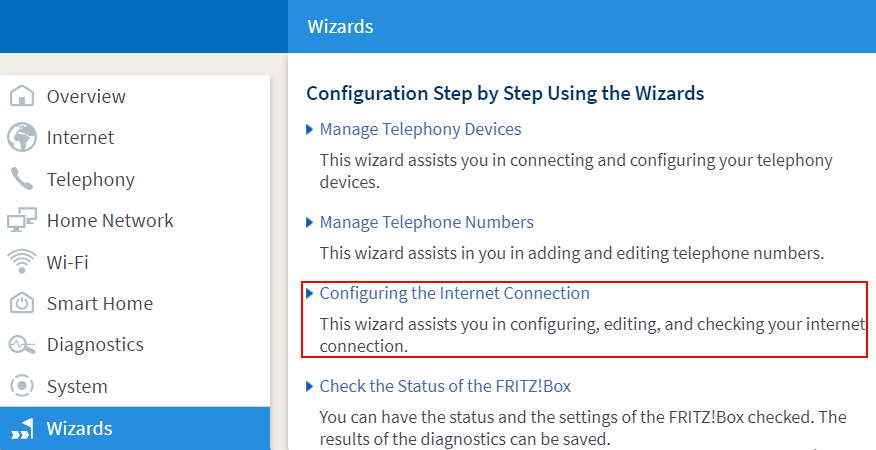
Calling up the FRITZ!Box wizard - Select 'iWay Fiber' from the drop-down list.
- Enable the connection type 'iWay Fiber CH DHCP (VLAN10)'.
- Click on 'Next' and follow the wizard's instructions.
- Now the FRITZ!Box checks whether the internet connection can be established. Configuration is complete as soon as the message 'The internet connection check was successful' is displayed.
Important:If the internet connection check fails, your internet access may not have been activated yet. In this case, contact iWay.
6 Setting up telephony in the FRITZ!Box
Define which phone number your telephony devices should use for making outgoing calls and to which phone numbers the telephony devices should react to when you receive calls:
- Click on 'Telephony' in the FRITZ!Box user interface.
- Click on 'Telephony Devices' in the 'Telephony' menu.
- Click on the
 (Edit) button for the respective telephony device.
 Important:If the telephony device was not configured yet, click on the 'Configure New Device' button and follow the wizard's instructions.
- From the 'Outgoing Calls' drop-down list, select the number to be used by the telephony device for making outgoing calls. If you do not select a phone number, the number entered under 'Telephony > Phone Numbers > Line Settings' is used for making calls.
- Select the phone numbers to which the telephony device should react when you receive calls. You can select up to ten numbers (including the number for outgoing calls).
- Click on 'Apply' to save the settings.