Knowledge Base
go directly to the main content
Setting up FRITZ!Box for use with an Adamo line
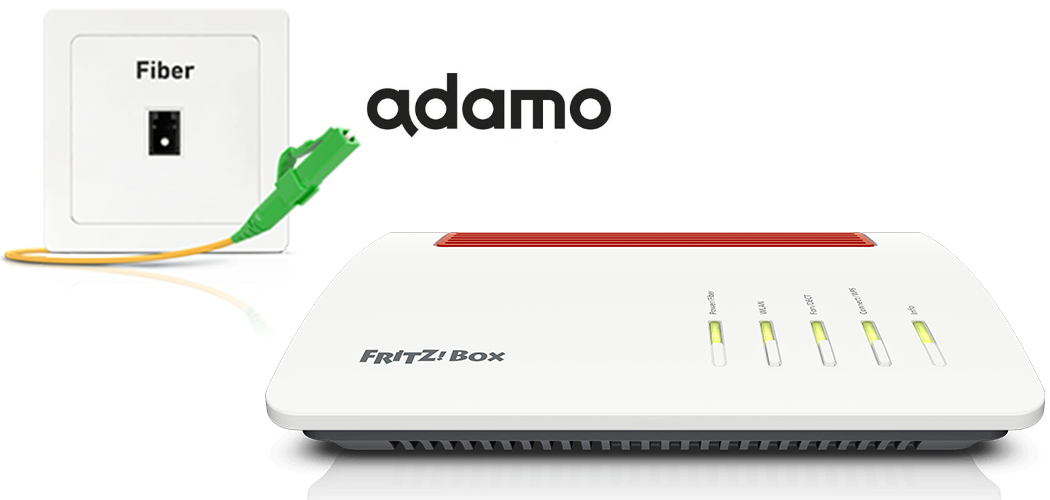
The FRITZ!Box is optimally prepared for use with Adamo. Simply connect the FRITZ!Box to the fiber optic connection and enter your personal account information in the FRITZ!Box user interface.
The complete FRITZ!Box range of functions for internet, multimedia, and smart home is then available to all of the devices in your home network without restriction.
Important:Currently, Adamo only allows customers to use their own routers if they have an internet connection without telephony.
Requirements / Restrictions
- FRITZ!Box with SFP module 'FRITZ!SFP GPON'
Note:All instructions on configuration and settings given in this guide refer to the latest FRITZ!OS for the FRITZ!Box.
1 Determining the PON serial number
- Take note of the PON serial number (for example 'GPON SN: [...]') on the type label on the fiber optic modem (ONT) or the router with an integrated fiber optic modem that you received from Adamo.
2 Inserting the SFP module into the FRITZ!Box
The FRITZ!Box is available in several different product variants, each of which is delivered with different components. If the FRITZ!Box you received did not have an SFP plug-in module inserted, perform the following steps:
- Insert the SFP module 'FRITZ!SFP GPON' into the fiber slot of the FRITZ!Box.
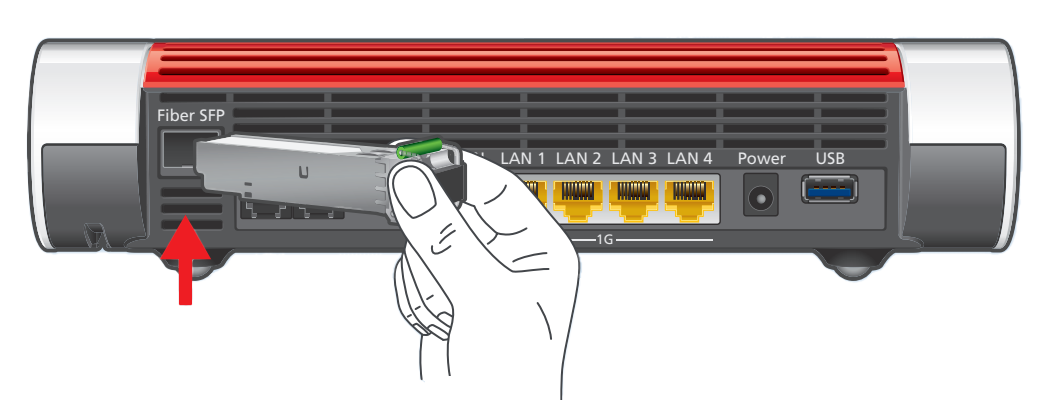
Inserting the SFP module into the FRITZ!Box
3 Connecting the FRITZ!Box to your fiber optic connection
- Remove the dust protection caps from the fiber optic cable, the SFP module in the FRITZ!Box, and from the fiber optic socket.
- Connect the fiber optic cable to the SFP module in the FRITZ!Box and to the fiber optic socket. Do not bend the fiber optic cable and do not hold the ends of the cable in front of your eyes.
Note:You can find information on selecting a suitable fiber optic cable in our guide Which fiber optic cable do I need?
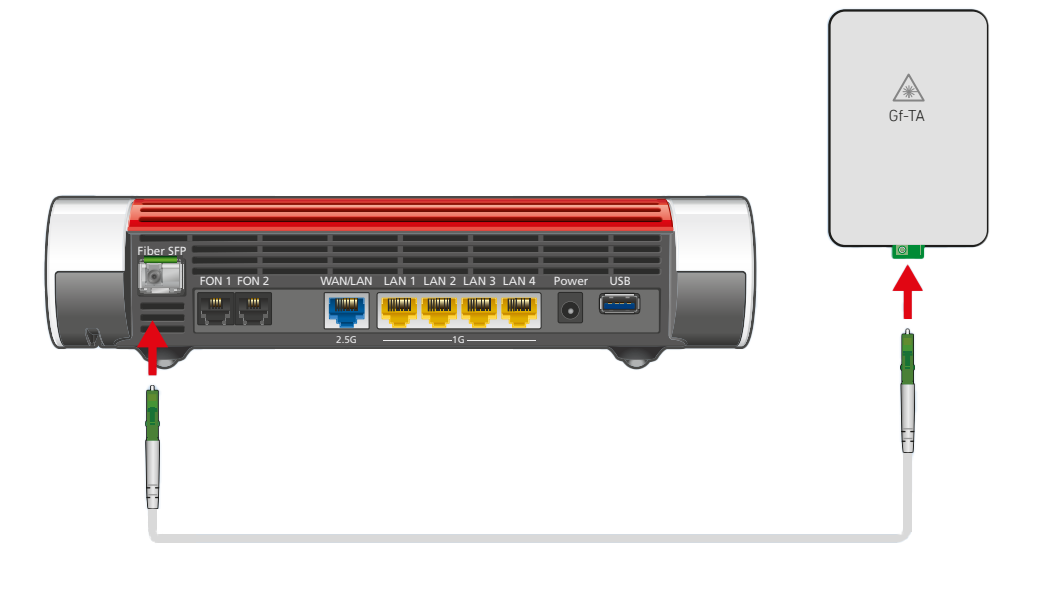
Connecting the FRITZ!Box to the fiber optic connection
4 Plugging the FRITZ!Box in
- Plug the power adapter into the FRITZ!Box's power socket and plug it into an electrical socket.
5 Entering the PON serial number in the FRITZ!Box
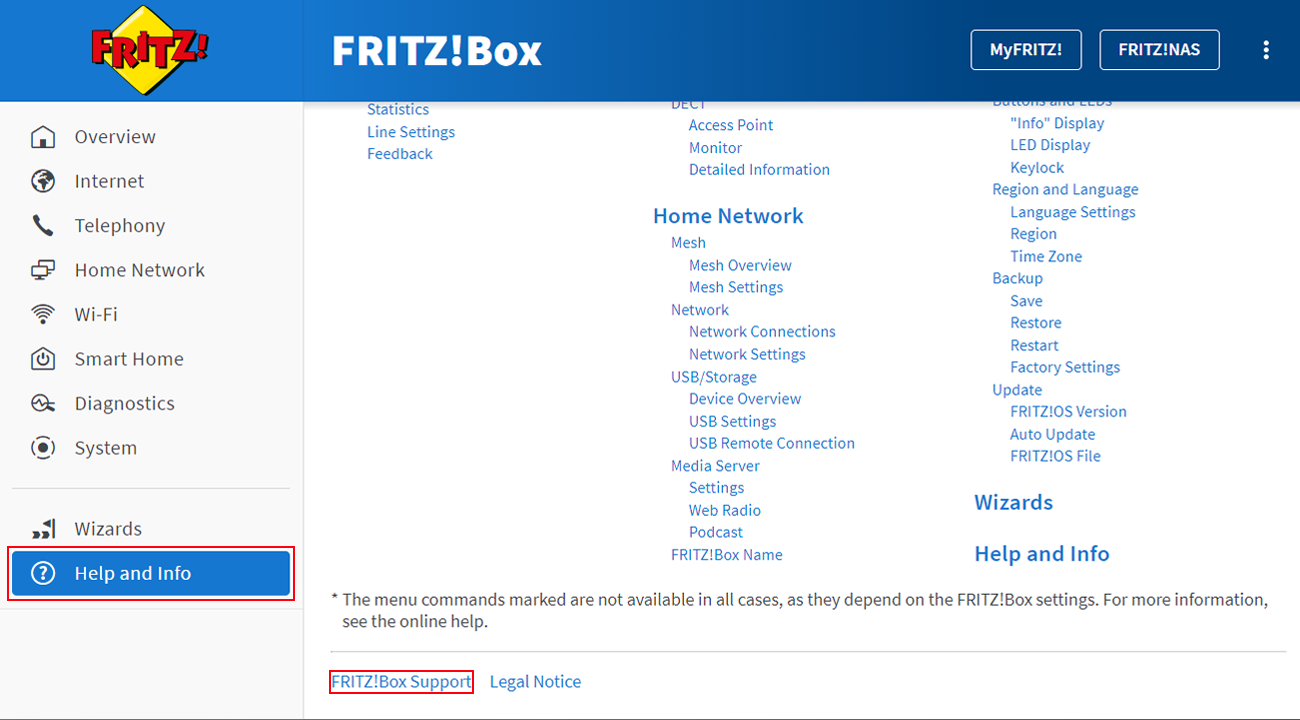
- In the FRITZ!Box user interface, click on 'Help and Info' on the bottom left of the page and then on 'FRITZ!Box Support' at the bottom.
- In the 'GPON PLOAM' section, enter the PON serial number of the fiber optic modem (ONT) or router with an integrated fiber optic modem that you received from Adamo.
Note:Normally the PON serial number is printed on the type label of the device you received from DIGI (for example 'GPON SN: [...]').
- Click on 'Apply setting' to save the settings.
6 Configuring the internet connection in the FRITZ!Box
- Open the FRITZ!Box user interface.
- Enter the FRITZ!Box password given on the type label of the FRITZ!Box and click on 'Log In'.
- Click on 'Internet' and then on 'Account Information'.
- Select 'other internet service provider' from the drop-down list 'Internet service provider'.
- Enable the 'Fiber optics' option.
- Enable the 'No' option in the 'Account Information' section.
- Click on 'Change connection settings'.
- Enter the speeds of your internet connection in the 'Downstream' and 'Upstream' fields.
- Enable the 'Use VLAN for internet access' option.
- Enter 603 in the 'VLAN ID' field and 1 in the 'PBit' field.
- Click on 'Apply' to save the settings.
- Now the FRITZ!Box checks whether the internet connection can be established. Configuration is complete as soon as the message 'The internet connection check was successful' is displayed.
Important:If the internet connection check fails, your internet access may not have been activated yet. In this case, contact Adamo.